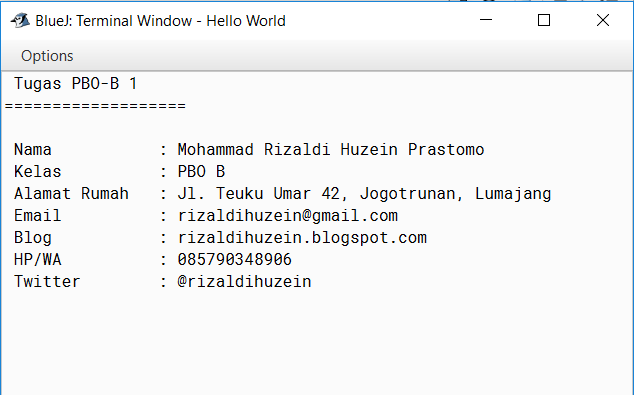
Minggu, 30 September 2018

Tugas PBO Digital Clock

TUGAS PBODIGITAL CLOCK


Pada kesempatan kali ini, saya mencoba membuat digital clock menggunakan Java dan GUI dengan awt dan swing. Pada kali ini ada 4 class yang dibuat, yakni

  1. number : untuk digit yang tertera pada jam digital
  2. display : untuk menampung dan fungsi fungsi sederhana jam
  3. tampil : untuk menampilkan jam digital secara bukan GUI dengan format 24 jam
  4. gui : menampilkan jam digital secara gui dengan button dan panel menggunakan JFrame
Berikut diagram class:
Berikut output jam secara non-gui iterasi


Berikut classnya:
1. number:

/**
 * Write a description of class Numbers here.
 *
 * @author (your name)
 * @version (a version number or a date)
 */
public class number
{
    private int limit;
    private int time;
    
    public number(int input)
    {
        limit = input;
        time = 0;
    }
    
    public int gettime(){
        return time;
    }
    
    public void settime(int input){
        if(input>=0 && input<limit) time=input;
    }
    
    public String tampil(){
        if(time<10){
            return "0"+time;
        }
        else{
            return "" +time;
        }
    }
    
    public void waktu(){
            time = (time+1)%limit;
    }
}


2. display

/**
 * Write a description of class clockdisplay here.
 *
 * @author (your name)
 * @version (a version number or a date)
 */

public class display
{
    private number jam,menit,detik;
    private String tampil;
    public display(){
        jam = new number(24);
        menit = new number(60);
        detik = new number(60);
        update();
    }
    
    public display(int j, int m, int d){
        jam = new number(24);
        menit = new number(60);
        detik = new number(60);
        setwaktu(j,m,d);
        update();
    }
    
    public void setwaktu(int j, int m, int d){
        jam.settime(j);
        menit.settime(m);
        detik.settime(d);
        update();
    }
    
    public void berdetik(){
        detik.waktu();
        if(detik.gettime()==0){
            menit.waktu();
            if(menit.gettime()==0)jam.waktu();
        }
        update();
    }
    
    public void update(){
        String tempj,tempm,tempd;
        if(jam.gettime()<10) tempj="0"+jam.gettime();
        else tempj = tempj=""+jam.gettime();
        if(menit.gettime()<10) tempm="0"+menit.gettime();
        else tempm=""+menit.gettime();
        if(detik.gettime()<10) tempd="0"+detik.gettime();
        else tempd=""+detik.gettime();
        tampil = tempj+":"+tempm+":"+tempd;
    }
    
    public void clock(){
        System.out.println(tampil);
    }
    
    public String gettampil(){
        return tampil;
    }
    
}


3.tampil

/**
 * Write a description of class tampil here.
 *
 * @author (your name)
 * @version (a version number or a date)
 */
public class tampil
{
    public static void disp() throws InterruptedException{
        display waktu = new display(22,58,57);
        while(true){
            waktu.clock();
            waktu.berdetik();
            Thread.sleep(1000);
            System.out.print('\u000C');
        }
    }
    
}


Dan berikut ketika diberi GUI
berikut kelas gui
 import java.awt.*;    
 import java.awt.event.*;    
 import javax.swing.*;    
 import javax.swing.border.*;  
 import java.util.Scanner;  
 public class gui  
 {  
   private JFrame frame;    
   private JLabel label;    
   private display tampil;    
   private boolean clockRunning = false; //jam digital belum berdetik  
   private TimerThread timerThread;   
   public int sHour, sMinute, sSecond;     
   public void Clock()    
   {    
    makeFrame();    
    tampil = new display(22,58,57);      
   }   
   private void start()    
   {    
    clockRunning = true; //jam digital berdetik  
    timerThread = new TimerThread();    
    timerThread.start();  
   }    
   private void stop()    
   {    
    clockRunning = false;    
   }    
   private void step()    
   {    
    tampil.berdetik();    
    label.setText(tampil.gettampil());    
   }    
   private void showAbout()    
   {    
    JOptionPane.showMessageDialog (frame, "Jam Digital Sederhana","About Clock",JOptionPane.INFORMATION_MESSAGE);  
   }    
   private void quit()    
   {    
    System.exit(0);    
   }    
   private void makeFrame()    
   {    
    frame = new JFrame("Clock");    
    JPanel contentPane = (JPanel)frame.getContentPane();    
    contentPane.setBorder(new EmptyBorder(1,60,1,60));    
    makeMenuBar(frame);    
    contentPane.setLayout(new BorderLayout(12,12));    
    label = new JLabel("00:00:00", SwingConstants.CENTER);    
    Font displayFont = label.getFont().deriveFont(96.0f);    
    label.setFont(displayFont);    
    contentPane.add(label, BorderLayout.CENTER);    
    JPanel toolbar = new JPanel();    
    toolbar.setLayout(new GridLayout(1,0));  
    JButton startButton = new JButton("Start");    
    startButton.addActionListener(e->start());    
    toolbar.add(startButton);   
    JButton stopButton = new JButton("Stop");    
    stopButton.addActionListener(e->stop());    
    toolbar.add(stopButton);   
    JButton stepButton = new JButton("Step");    
    stepButton.addActionListener(e->step());    
    toolbar.add(stepButton);    
    JPanel flow = new JPanel();    
    flow.add(toolbar);    
    contentPane.add(flow, BorderLayout.SOUTH);    
    frame.pack();    
    Dimension d = Toolkit.getDefaultToolkit().getScreenSize();    
    frame.setLocation(d.width/2 - frame.getWidth()/2, d.height/2 - frame.getHeight()/2);    
    frame.setVisible(true);    
   }    
   private void makeMenuBar(JFrame frame)    
   {    
    final int SHORTCUT_MASK =    
    Toolkit.getDefaultToolkit().getMenuShortcutKeyMask();    
    JMenuBar menubar = new JMenuBar();    
    frame.setJMenuBar(menubar);    
    JMenu menu;    
    JMenuItem item;    
    menu = new JMenu("File");    
    menubar.add(menu);    
    item = new JMenuItem("About Clock...");    
    item.addActionListener(e->showAbout());    
    menu.add(item);    
    menu.addSeparator();    
    item = new JMenuItem("Quit");    
    item.setAccelerator(KeyStroke.getKeyStroke(KeyEvent.VK_Q,SHORTCUT_MASK));    
    item.addActionListener(e->quit());    
    menu.add(item);    
   }    
   class TimerThread extends Thread    
   {    
    public void run()    
    {    
     while(clockRunning)    
     {    
      step();    
      pause();    
     }    
   }    
   private void pause()    
   {    
    try    
    {    
     Thread.sleep(900);    
    }    
    catch(InterruptedException exc)    
    {    
    }    
   }    
   }  
 }  

Minggu, 23 September 2018

Tugas PBO Remote TV

Tugas PBO Remote TV


Pada kesempatan kali ini, saya mencoba membuat sebuah remote TV dengan menggunakan Java. Remote TV memiliki beberapa method, yakni,
1. Nyalakan Tivi
2. Tambah Channel
3. Kurangi Channel
4. Set Channel
5. Tambah Volume
6. Kurangi Volume
Apabila Tivi mati maka semua method tersebut tidak dapat digunakan, dan tidak ada channel negatif.
Contoh Output seperti berikut:


 Dari Output diatas, saya menggunakan metode clrscreen untuk tetap memberikan 1 layar tivi dan 1 remote tv, dengan code "System.out.print('\u000C');"
Berikut diagram classnya:

Melihat tivi melalui kelas lihat tv, sedangkan layar diperoleh dari kelas tv, dan interaksi didapat dari kelas remote, berikut source code nya

lihattv :


/**
 * Lihat TV disini
 *
 * @author (M. Rizaldi Huzein P.)
 * @version (9/19/2018)
 */

import java.util.Scanner;

public class lihattv
{
    public static void lihattv()
    {
        int pilih;
        Scanner scan = new Scanner(System.in);
        tv tivi = new tv();
        remote remot = new remote();
        while(true)
        {

            if(remot.getpower()) tivi.tampil(remot.getchannel(),remot.getvol());
            else tivi.mati();
            System.out.println("0. Turn on/off");
            System.out.println("1. Channel +");
            System.out.println("2. Channel -");
            System.out.println("3. Set Channel");
            System.out.println("4. Volume +");
            System.out.println("5. Volume -");
            pilih = scan.nextInt();
            switch(pilih)
            {
                case 0:
                remot.powerset();
                break;
                case 1:
                if(remot.getchannel()<20) remot.chp();
                else if(remot.getchannel()==20) remot.chset(0);
                break;
                case 2:
                if(remot.getpower()){
                if(remot.getchannel()>0) remot.chm();
                else if(remot.getchannel()==0) remot.chset(20);
                }
                break;
                case 3:
                if(remot.getpower()){
                int ch = scan.nextInt();
                if(ch>20) System.out.println("Tidak ada channel");
                else remot.chset(ch);}
                break;
                case 4:
                if(remot.getpower()){
                if(remot.getvol()<10) remot.volp();}
                break;
                case 5:
                if(remot.getpower()){
                if(remot.getvol()>0) remot.volm();}
                break;
            }
            System.out.print('\u000C');
        }
    }
}


tv :

/**
 * Objek TV yang dipakai
 *
 * @author (M. Rizaldi Huzein P.)
 * @version (9/19/2018)
 */
import java.util.Scanner;

public class tv
{
   
   public void tampil(int channel,int volume)
   {
       System.out.println("==================");
       System.out.println("Channel: "+channel);
       System.out.println("==================");
       System.out.println("");
       System.out.println("");
       System.out.println("");
       System.out.println("");
       System.out.print("Volume:");
       for(int i=0;i<volume;i=i+1){System.out.print("|");}
       System.out.println("\n==================");
   }
   public void mati()
   {
       System.out.println("==================");
       System.out.println("    NO SIGNAL");
       System.out.println("==================");
       System.out.println("");
       System.out.println("");
       System.out.println("");
       System.out.println("");
       System.out.print("");
       System.out.println("\n==================");
   }
}


remote:

/**
 * Objek Remote tv
 *
 * @author (M. Rizaldi Huzein P.)
 * @version (9/19/2018)
 */
public class remote
{
    private int channel, vol, brightness, signal;
    private boolean power, avi;
    
    public remote()
    {
        channel=0;
        vol=0;
        power=false;
        avi=true;
        brightness=50;
        signal=114;
    }
    public int getvol()
    {
        return vol;
    }
    public int getchannel()
    {
        return channel;
    }
    public boolean getpower()
    {
        return power;
    }
    public boolean getavi()
    {
        return avi;
    }
    public void volp()
    {
        vol=vol+1;
    }
    public void volm()
    {
        vol=vol-1;
    }
    public void chp()
    {
        channel=channel+1;
    }
    public void chm()
    {
        channel=channel-1;
    }
    public void chset(int ch)
    {
        channel=ch;
    }
    public void powerset()
    {
        if(!power) power=true;
        else power=false;
    }
    public void aviset()
    {
        if(!avi) avi=true;
        else avi=false;
    }
}

Berikut merupakan file BlueJ yang dapat diakses Link file

Minggu, 16 September 2018

Tugas PBO P4

TUGAS P4 PBO
Membuat Mesin Tiket

Pada pertemuan kali ini kami belajar membuat mesin tiket dengan menggunakan Java.
Tugas dalam pertemuan kali ini adalah membuat mesin tiket dengan fungsi:
  1. Mengetahui harga tiket satuan
  2. Mengetahui saldo yang dimiliki
  3. Memasukkan uang 
  4. Mencetak tiket sebanyak n-tiket
  5. Mengambil kembalian jika ada
  6. Mengakhiri sesi
Berikut merupakan contoh output dari program yang saya buat :

Input harga tiket sebesar 15.000

Print 4 tiket 

Mengambil kembalian dan mengakhiri sesi


Berikut class yang ada:


Berikut class secara detailnya:
  • machine :

/**
 * Mesin tiket yang digunakan
 *
 * @author (M Rizaldi Huzein P)
 * @version (9/17/2018)
 */
public class machine
{
    private int price;
    private int balance;
    private int total;
    
    public machine(int nom)
    {
        price = nom;
        balance = 0;
        total = 0;
    }
    
    public int byharga()
    {
        return price;
    }
    
    public int bybalance()
    {
        return balance;
    }
    
    public void masuk(int am)
    {
        balance = balance + am;
    }
    
    public void print(int am)
    {
        total = am*price;
        if(balance>=total){
            for(int i=0;i<am;i++){
                System.out.println("##################");
                System.out.println("#Tiket Kereta Api#");
                System.out.println("#Rp "+price+"#");
                System.out.println("##################\n");
            }
            balance = balance - total;
        }
        else System.out.println("Saldo tidak cukup");
        
    }
    
    public int kembali()
    {
        if(balance>0){
            balance = 0; 
        }
        
        return balance;
    }
}

  • ui:

/**
 * Kode dari UI
 *
 * @author (M Rizaldi Huzein P)
 * @version (9/17/2018)
 */
import java.util.Scanner;

public class ui
{
    
    public static void main(String args[])
    {
        Scanner scan = new Scanner(System.in);
        int harga;
        int opsi;
        System.out.print("Masukkan harga tiket:");
        harga = scan.nextInt();
        machine Tiket = new machine(harga);
        System.out.println("1. Harga Tiket");
        System.out.println("2. Jumlah Saldo");
        System.out.println("3. Masukkan Uang");
        System.out.println("4. Cetak Tiket");
        System.out.println("5. Ambil Kembalian");
        System.out.println("6. Selesai");
        opsi = scan.nextInt();
        while(opsi!=6){    
            switch(opsi){
                case 1:
                harga = Tiket.byharga();
                System.out.println("Harga: "+harga);
                break;
                case 2:
                System.out.println("Saldo: "+Tiket.bybalance());
                break;
                case 3:
                System.out.println("Masukkan uang:");
                Tiket.masuk(scan.nextInt());
                break;
                case 4:
                System.out.println("Print sejumlah:");
                int am = scan.nextInt();
                Tiket.print(am);
                break;
                case 5:
                if(Tiket.bybalance() > 0){
                    System.out.println("Kembalian sebesar: Rp "+Tiket.bybalance());
                    Tiket.kembali();
                }
                else System.out.println("Tidak ada kembalian");
                break;
            }
            opsi = scan.nextInt();
            if(opsi == 6) System.out.println("Terimakasih");
        }
    }
    
}

Tugas PBO Menggambar Pemandangan

Tugas PBO

Visualisasi Objek dengan Pemandangan


Di pertemuan kali ini, kami mendapat pengetahuan mengenai class dan object dalam pemrograman. Pada dasarnya Class memiliki field yang merupakan ciri-ciri dari object, dan method yang merupakan sifat/fungsi dari objek tersebut.

Di misalkan sebagai bangun dua dimensi yang dibentuk membentuk pemandangan.

Contoh Output :


Diagram kelas:


Kelas Triangle:

import java.awt.*;

/**
 * A triangle that can be manipulated and that draws itself on a canvas.
 * 
 * @author  Michael Kölling and David J. Barnes
 * @version 1.0  (15 July 2000)
 */

public class Triangle
{
    private int height;
    private int width;
    private int xPosition;
    private int yPosition;
    private String color;
    private boolean isVisible;

    /**
     * Create a new triangle at default position with default color.
     */
    public Triangle(int x, int y, String cl, int h, int w)
    {
        height = h;
        width = w;
        xPosition = x;
        yPosition = y;
        color = cl;
        isVisible = true;
        draw();
    }

    /**
     * Make this triangle visible. If it was already visible, do nothing.
     */
    public void makeVisible()
    {
        isVisible = true;
        draw();
    }

    /**
     * Make this triangle invisible. If it was already invisible, do nothing.
     */
    public void makeInvisible()
    {
        erase();
        isVisible = false;
    }

    /**
     * Move the triangle a few pixels to the right.
     */
    public void moveRight()
    {
        moveHorizontal(20);
    }

    /**
     * Move the triangle a few pixels to the left.
     */
    public void moveLeft()
    {
        moveHorizontal(-20);
    }

    /**
     * Move the triangle a few pixels up.
     */
    public void moveUp()
    {
        moveVertical(-20);
    }

    /**
     * Move the triangle a few pixels down.
     */
    public void moveDown()
    {
        moveVertical(20);
    }

    /**
     * Move the triangle horizontally by 'distance' pixels.
     */
    public void moveHorizontal(int distance)
    {
        erase();
        xPosition += distance;
        draw();
    }

    /**
     * Move the triangle vertically by 'distance' pixels.
     */
    public void moveVertical(int distance)
    {
        erase();
        yPosition += distance;
        draw();
    }

    /**
     * Slowly move the triangle horizontally by 'distance' pixels.
     */
    public void slowMoveHorizontal(int distance)
    {
        int delta;

        if(distance < 0) 
        {
            delta = -1;
            distance = -distance;
        }
        else 
        {
            delta = 1;
        }

        for(int i = 0; i < distance; i++)
        {
            xPosition += delta;
            draw();
        }
    }

    /**
     * Slowly move the triangle vertically by 'distance' pixels.
     */
    public void slowMoveVertical(int distance)
    {
        int delta;

        if(distance < 0) 
        {
            delta = -1;
            distance = -distance;
        }
        else 
        {
            delta = 1;
        }

        for(int i = 0; i < distance; i++)
        {
            yPosition += delta;
            draw();
        }
    }

    /**
     * Change the size to the new size (in pixels). Size must be >= 0.
     */
    public void changeSize(int newHeight, int newWidth)
    {
        erase();
        height = newHeight;
        width = newWidth;
        draw();
    }

    /**
     * Change the color. Valid colors are "red", "yellow", "blue", "green",
     * "magenta" and "black".
     */
    public void changeColor(String newColor)
    {
        color = newColor;
        draw();
    }

    /*
     * Draw the triangle with current specifications on screen.
     */
    private void draw()
    {
        if(isVisible) {
            Canvas canvas = Canvas.getCanvas();
            int[] xpoints = { xPosition, xPosition + (width/2), xPosition - (width/2) };
            int[] ypoints = { yPosition, yPosition + height, yPosition + height };
            canvas.draw(this, color, new Polygon(xpoints, ypoints, 3));
            canvas.wait(10);
        }
    }

    /*
     * Erase the triangle on screen.
     */
    private void erase()
    {
        if(isVisible) {
            Canvas canvas = Canvas.getCanvas();
            canvas.erase(this);
        }
    }
}


Kelas Square:

import java.awt.*;

/**
 * A square that can be manipulated and that draws itself on a canvas.
 * 
 * @author  Michael Kölling and David J. Barnes
 * @version 1.0  (15 July 2000)
 */

public class Square
{
    private int height, width;
    private int xPosition;
    private int yPosition;
    private String color;
    private boolean isVisible;

    /**
     * Create a new square at default position with default color.
     */
    public Square(int x,int y, String cl,int h, int w)
    {
        height = h;
        width = w;
        xPosition = x;
        yPosition = y;
        color = cl;
        isVisible = true;
        draw();
    }

    /**
     * Make this square visible. If it was already visible, do nothing.
     */
    public void makeVisible()
    {
        isVisible = true;
        draw();
    }

    /**
     * Make this square invisible. If it was already invisible, do nothing.
     */
    public void makeInvisible()
    {
        erase();
        isVisible = false;
    }

    /**
     * Move the square a few pixels to the right.
     */
    public void moveRight()
    {
        moveHorizontal(20);
    }

    /**
     * Move the square a few pixels to the left.
     */
    public void moveLeft()
    {
        moveHorizontal(-20);
    }

    /**
     * Move the square a few pixels up.
     */
    public void moveUp()
    {
        moveVertical(-20);
    }

    /**
     * Move the square a few pixels down.
     */
    public void moveDown()
    {
        moveVertical(20);
    }

    /**
     * Move the square horizontally by 'distance' pixels.
     */
    public void moveHorizontal(int distance)
    {
        erase();
        xPosition += distance;
        draw();
    }

    /**
     * Move the square vertically by 'distance' pixels.
     */
    public void moveVertical(int distance)
    {
        erase();
        yPosition += distance;
        draw();
    }

    /**
     * Slowly move the square horizontally by 'distance' pixels.
     */
    public void slowMoveHorizontal(int distance)
    {
        int delta;

        if(distance < 0) 
        {
            delta = -1;
            distance = -distance;
        }
        else 
        {
            delta = 1;
        }

        for(int i = 0; i < distance; i++)
        {
            xPosition += delta;
            draw();
        }
    }

    /**
     * Slowly move the square vertically by 'distance' pixels.
     */
    public void slowMoveVertical(int distance)
    {
        int delta;

        if(distance < 0) 
        {
            delta = -1;
            distance = -distance;
        }
        else 
        {
            delta = 1;
        }

        for(int i = 0; i < distance; i++)
        {
            yPosition += delta;
            draw();
        }
    }

    /**
     * Change the size to the new size (in pixels). Size must be >= 0.
     
    public void changeSize(int newSize)
    {
        erase();
        size = newSize;
        draw();
    }
    */

    /**
     * Change the color. Valid colors are "red", "yellow", "blue", "green",
     * "magenta" and "black".
     */
    public void changeColor(String newColor)
    {
        color = newColor;
        draw();
    }

    /*
     * Draw the square with current specifications on screen.
     */
    private void draw()
    {
        if(isVisible) {
            Canvas canvas = Canvas.getCanvas();
            canvas.draw(this, color,
                    new Rectangle(xPosition, yPosition, width, height));
            canvas.wait(10);
        }
    }

    /*
     * Erase the square on screen.
     */
    private void erase()
    {
        if(isVisible) {
            Canvas canvas = Canvas.getCanvas();
            canvas.erase(this);
        }
    }
}


Kelas Circe:
import java.awt.*;
import java.awt.geom.*;

/**
 * A circle that can be manipulated and that draws itself on a canvas.
 * 
 * @author  Michael Kölling and David J. Barnes
 * @version 1.0  (15 July 2000)
 */

public class Circle
{
    private int diameter;
    private int xPosition;
    private int yPosition;
    private String color;
    private boolean isVisible;

    /**
     * Create a new circle at default position with default color.
     */
    public Circle(int x,int y, String cl, int di)
    {
        diameter = di;
        xPosition = x;
        yPosition = y;
        color = cl;
        isVisible = true;
        draw();
    }

    /**
     * Make this circle visible. If it was already visible, do nothing.
     */
    public void makeVisible()
    {
        isVisible = true;
        draw();
    }

    /**
     * Make this circle invisible. If it was already invisible, do nothing.
     */
    public void makeInvisible()
    {
        erase();
        isVisible = false;
    }

    /**
     * Move the circle a few pixels to the right.
     */
    public void moveRight()
    {
        moveHorizontal(20);
    }

    /**
     * Move the circle a few pixels to the left.
     */
    public void moveLeft()
    {
        moveHorizontal(-20);
    }

    /**
     * Move the circle a few pixels up.
     */
    public void moveUp()
    {
        moveVertical(-20);
    }

    /**
     * Move the circle a few pixels down.
     */
    public void moveDown()
    {
        moveVertical(20);
    }

    /**
     * Move the circle horizontally by 'distance' pixels.
     */
    public void moveHorizontal(int distance)
    {
        erase();
        xPosition += distance;
        draw();
    }

    /**
     * Move the circle vertically by 'distance' pixels.
     */
    public void moveVertical(int distance)
    {
        erase();
        yPosition += distance;
        draw();
    }

    /**
     * Slowly move the circle horizontally by 'distance' pixels.
     */
    public void slowMoveHorizontal(int distance)
    {
        int delta;

        if(distance < 0) 
        {
            delta = -1;
            distance = -distance;
        }
        else 
        {
            delta = 1;
        }

        for(int i = 0; i < distance; i++)
        {
            xPosition += delta;
            draw();
        }
    }

    /**
     * Slowly move the circle vertically by 'distance' pixels.
     */
    public void slowMoveVertical(int distance)
    {
        int delta;

        if(distance < 0) 
        {
            delta = -1;
            distance = -distance;
        }
        else 
        {
            delta = 1;
        }

        for(int i = 0; i < distance; i++)
        {
            yPosition += delta;
            draw();
        }
    }

    /**
     * Change the size to the new size (in pixels). Size must be >= 0.
     */
    public void changeSize(int newDiameter)
    {
        erase();
        diameter = newDiameter;
        draw();
    }

    /**
     * Change the color. Valid colors are "red", "yellow", "blue", "green",
     * "magenta" and "black".
     */
    public void changeColor(String newColor)
    {
        color = newColor;
        draw();
    }

    /*
     * Draw the circle with current specifications on screen.
     */
    private void draw()
    {
        if(isVisible) {
            Canvas canvas = Canvas.getCanvas();
            canvas.draw(this, color, new Ellipse2D.Double(xPosition, yPosition, 
                    diameter, diameter));
            canvas.wait(10);
        }
    }

    /*
     * Erase the circle on screen.
     */
    private void erase()
    {
        if(isVisible) {
            Canvas canvas = Canvas.getCanvas();
            canvas.erase(this);
        }
    }
}


Kelas Canvas:
import javax.swing.*;
import java.awt.*;
import java.util.List;
import java.util.*;

/**
 * Canvas is a class to allow for simple graphical drawing on a canvas.
 * This is a modification of the general purpose Canvas, specially made for
 * the BlueJ "shapes" example. 
 *
 * @author: Bruce Quig
 * @author: Michael Kölling (mik)
 *
 * @version: 1.6 (shapes)
 */
public class Canvas
{
    // Note: The implementation of this class (specifically the handling of
    // shape identity and colors) is slightly more complex than necessary. This
    // is done on purpose to keep the interface and instance fields of the
    // shape objects in this project clean and simple for educational purposes.

    private static Canvas canvasSingleton;

    /**
     * Factory method to get the canvas singleton object.
     */
    public static Canvas getCanvas()
    {
        if(canvasSingleton == null) {
            canvasSingleton = new Canvas("BlueJ Shapes Demo", 600, 600, 
                    Color.white);
        }
        canvasSingleton.setVisible(true);
        return canvasSingleton;
    }

    //  ----- instance part -----

    private JFrame frame;
    private CanvasPane canvas;
    private Graphics2D graphic;
    private Color backgroundColour;
    private Image canvasImage;
    private List<Object> objects;
    private HashMap<Object, ShapeDescription> shapes;
    
    /**
     * Create a Canvas.
     * @param title  title to appear in Canvas Frame
     * @param width  the desired width for the canvas
     * @param height  the desired height for the canvas
     * @param bgClour  the desired background colour of the canvas
     */
    private Canvas(String title, int width, int height, Color bgColour)
    {
        frame = new JFrame();
        canvas = new CanvasPane();
        frame.setContentPane(canvas);
        frame.setTitle(title);
        canvas.setPreferredSize(new Dimension(width, height));
        backgroundColour = bgColour;
        frame.pack();
        objects = new ArrayList<Object>();
        shapes = new HashMap<Object, ShapeDescription>();
    }

    /**
     * Set the canvas visibility and brings canvas to the front of screen
     * when made visible. This method can also be used to bring an already
     * visible canvas to the front of other windows.
     * @param visible  boolean value representing the desired visibility of
     * the canvas (true or false) 
     */
    public void setVisible(boolean visible)
    {
        if(graphic == null) {
            // first time: instantiate the offscreen image and fill it with
            // the background colour
            Dimension size = canvas.getSize();
            canvasImage = canvas.createImage(size.width, size.height);
            graphic = (Graphics2D)canvasImage.getGraphics();
            graphic.setColor(backgroundColour);
            graphic.fillRect(0, 0, size.width, size.height);
            graphic.setColor(Color.black);
        }
        frame.setVisible(visible);
    }

    /**
     * Draw a given shape onto the canvas.
     * @param  referenceObject  an object to define identity for this shape
     * @param  color            the color of the shape
     * @param  shape            the shape object to be drawn on the canvas
     */
     // Note: this is a slightly backwards way of maintaining the shape
     // objects. It is carefully designed to keep the visible shape interfaces
     // in this project clean and simple for educational purposes.
    public void draw(Object referenceObject, String color, Shape shape)
    {
        //objects.remove(referenceObject);   // just in case it was already there
        objects.add(referenceObject);      // add at the end
        shapes.put(referenceObject, new ShapeDescription(shape, color));
        redraw();
    }
 
    /**
     * Erase a given shape's from the screen.
     * @param  referenceObject  the shape object to be erased 
     */
    public void erase(Object referenceObject)
    {
        objects.remove(referenceObject);   // just in case it was already there
        shapes.remove(referenceObject);
        redraw();
    }

    /**
     * Set the foreground colour of the Canvas.
     * @param  newColour   the new colour for the foreground of the Canvas 
     */
    public void setForegroundColor(String colorString)
    {
        if(colorString.equals("red"))
            graphic.setColor(Color.red);
        else if(colorString.equals("black"))
            graphic.setColor(Color.black);
        else if(colorString.equals("blue"))
            graphic.setColor(Color.blue);
        else if(colorString.equals("yellow"))
            graphic.setColor(Color.yellow);
        else if(colorString.equals("green"))
            graphic.setColor(Color.green);
        else if(colorString.equals("magenta"))
            graphic.setColor(Color.magenta);
        else if(colorString.equals("white"))
            graphic.setColor(Color.white);
        else if(colorString.equals("cyan"))
            graphic.setColor(Color.cyan);
        else if(colorString.equals("lgray"))
            graphic.setColor(Color.lightGray);
        else if(colorString.equals("gray"))
            graphic.setColor(Color.gray);
        else
            graphic.setColor(Color.black);
    }

    /**
     * Wait for a specified number of milliseconds before finishing.
     * This provides an easy way to specify a small delay which can be
     * used when producing animations.
     * @param  milliseconds  the number 
     */
    public void wait(int milliseconds)
    {
        try
        {
            Thread.sleep(milliseconds);
        } 
        catch (Exception e)
        {
            // ignoring exception at the moment
        }
    }

    /**
     * Redraw all shapes currently on the Canvas.
     */
    private void redraw()
    {
        erase();
        for(Iterator i=objects.iterator(); i.hasNext(); ) {
            ((ShapeDescription)shapes.get(i.next())).draw(graphic);
        }
        canvas.repaint();
    }
       
    /**
     * Erase the whole canvas. (Does not repaint.)
     */
    private void erase()
    {
        Color original = graphic.getColor();
        graphic.setColor(backgroundColour);
        Dimension size = canvas.getSize();
        graphic.fill(new Rectangle(0, 0, size.width, size.height));
        graphic.setColor(original);
    }


    /************************************************************************
     * Inner class CanvasPane - the actual canvas component contained in the
     * Canvas frame. This is essentially a JPanel with added capability to
     * refresh the image drawn on it.
     */
    private class CanvasPane extends JPanel
    {
        public void paint(Graphics g)
        {
            g.drawImage(canvasImage, 0, 0, null);
        }
    }
    
    /************************************************************************
     * Inner class CanvasPane - the actual canvas component contained in the
     * Canvas frame. This is essentially a JPanel with added capability to
     * refresh the image drawn on it.
     */
    private class ShapeDescription
    {
        private Shape shape;
        private String colorString;

        public ShapeDescription(Shape shape, String color)
        {
            this.shape = shape;
            colorString = color;
        }

        public void draw(Graphics2D graphic)
        {
            setForegroundColor(colorString);
            graphic.fill(shape);
        }
    }

}


Kelas Picture:

/**
 * Picture
 *
 * Rizaldi
 * 1
 */
public class Picture
{
    private Triangle gunung1;
    private Triangle gunung2;
    private Circle matahari;
    private Square sawah;
    private Square langit;
    private Triangle sungai;
    private Circle awan1;
    private Circle awan2;
    private Circle awan3;
    
    public void draw()
    {
        langit = new Square(0,0,"cyan", 600,600);
        matahari = new Circle(250,250,"yellow",100);
        gunung1 = new Triangle(150,150,"gray",150,300);
        gunung2 = new Triangle(450,150,"gray",150,300);
        sawah = new Square(0,300,"green",300,600);
        sungai = new Triangle(300,300,"cyan",300,200);
        awan1 = new Circle(0,10,"white",80);
        awan2 = new Circle(40,0,"white",100);
        awan3 = new Circle(100,10,"white",80);
        awan1 = new Circle(100,10,"lgray",80);
        awan2 = new Circle(140,0,"lgray",100);
        awan3 = new Circle(200,10,"lgray",80);
        awan1 = new Circle(60,60,"white",80);
        awan2 = new Circle(100,70,"lgray",100);
        awan3 = new Circle(160,60,"lgray",80);
        awan1 = new Circle(400,10,"white",80);
        awan2 = new Circle(440,0,"white",100);
        awan3 = new Circle(500,10,"white",80);
        
    }
}


Minggu, 09 September 2018

Tugas PBO 2

Perkenalan dalam Class dan Object


Di pertemuan kali ini, kami mendapat pengetahuan mengenai class dan object dalam pemrograman. Pada dasarnya Class memiliki field yang merupakan ciri-ciri dari object, dan method yang merupakan sifat/fungsi dari objek tersebut.

Di misalkan sebagai bangun ruang kubus yang memiliki field sisi dan method volume serta luas.

Kami membuat program dengan java dengan objek bangun-bangun dasar 3 dimensi.

Berikut merupakan contoh output,
Dari output tersebut, terdapat beberapa kelas yakni,
kubus, balok, tabung, dan bola
Ke empatnya di gunakan dalam sebuah class main yang merupakan kelas utama program tersebut.

Dari diagram diatas diadapati beberapa source code dibawah yang menjelaskan tiap class:
Kubus:

/**
 * Implementasi class kubus
 *
 * M Rizaldi H P
 * 9/10/2018
 */
public class kubus
{
    public double sisi;
    
    public double LP(){
        return 6*sisi*sisi;
    }
    
    public double V(){
        return sisi*sisi*sisi;
    }
}


Balok:

/**
 * Implementasi class balok
 *
 * M Rizaldi H P
 * 9/10/2018
 */
public class balok{
    public double panjang;
    public double lebar;
    public double tinggi;
    
    public double LP(){
        return (2*panjang*lebar)+(2*lebar*tinggi)+(2*panjang*tinggi);
    }
    
    public double V(){
        return panjang*lebar*tinggi;
    }
}

Tabung:

/**
 * Implementasi class tabung
 *
 * M Rizaldi H P
 * 9/10/2018
 */
public class tabung
{
    public double rad;
    public double tinggi;
    
    public double LP(){
        return (3.14*rad*rad*2)+(2*3.14*rad*tinggi);
    }
    
    public double V(){
        return 3.14*rad*rad*tinggi;
    }
}


Bola:

/**
 * Implementasi kelas bola
 *
 * M Rizaldi H P
 * 9/10/2018
 */
public class bola
{
    public double rad;
    
    public double LP(){
        return 4*3.14*rad*rad;
    }
    
    public double V(){
        return 4/3*3.14*rad*rad*rad;
    }
}


Yang mana seluruh class diatas disatukan dalam satu fungsi main:

/**
 * Program menghitung luas permukaan dan volume bangun 3d sederhana
 *
 * M Rizaldi H P - 05111740000024
 * 9/10/2018
 */
public class main
{
    public static void main()
    {
        kubus Kubus;
        Kubus = new kubus();
        Kubus.sisi = 4;
        double lpkubus = Kubus.LP();
        double vkubus = Kubus.V();
        System.out.println("Kubus");
        System.out.println("Sisi kubus : "+Kubus.sisi+" cm");
        System.out.println("Luas Permukaan Kubus : "+lpkubus+" cm^2");
        System.out.println("Volume Kubus : "+vkubus+" cm^3");
        System.out.println("----------------------------------");
        
        balok Balok;
        Balok = new balok();
        Balok.panjang = 2;
        Balok.lebar = 3;
        Balok.tinggi = 4;
        double lpbalok = Balok.LP();
        double vbalok = Balok.V();
        System.out.println("Balok");
        System.out.println("Panjang balok : "+Balok.panjang+" cm");
        System.out.println("Lebar balok : "+Balok.lebar+" cm");
        System.out.println("Tinggi balok : "+Balok.tinggi+" cm");
        System.out.println("Luas Permukaan Balok : "+lpbalok+" cm^2");
        System.out.println("Volume Balok : "+vbalok+" cm^3");
        System.out.println("----------------------------------");
        
        
        tabung Tabung;
        Tabung = new tabung();
        Tabung.rad = 7;
        Tabung.tinggi = 10;
        double lptabung = Tabung.LP();
        double vtabung = Tabung.V();
        System.out.println("Tabung");
        System.out.println("Radius alas Tabung : "+Tabung.rad+" cm");
        System.out.println("Tinggi Tabung : "+Tabung.tinggi+" cm");
        System.out.println("Luas Permukaan Tabung : "+lptabung+" cm^2");
        System.out.println("Volume Tabung : "+vtabung+" cm^3");
        System.out.println("----------------------------------");
        
        bola Bola;
        Bola = new bola();
        Bola.rad = 7;
        double lpbola = Bola.LP();
        double vbola = Bola.V();
        System.out.println("Bola");
        System.out.println("Radius Bola : "+Bola.rad+" cm");
        System.out.println("Luas Permukaan Bola : "+lpbola+" cm^2");
        System.out.println("Volume Bola : "+vbola+" cm^3");
        System.out.println("----------------------------------");
    }
}


Berikut merupakan program dari objek bangun 3 dimensi
Terimakasih

Minggu, 02 September 2018

Tugas PBO 1 : Membuat Program Java dengan BlueJ

Membuat Program Java menggunakan BlueJ

Mohammad Rizaldi Huzein Prastomo
05111740000024

Programming bisa menggunakan banyak bahasa, dimana salah satunya adalah Java. Penggunaan Bahasa Java bisa dipermudah dengan adanya aplikasi BlueJ ini yang mengoordinasi setiap class pada sourcecode dengan visualisasi.

Program yang dibuat memberi output berupa Data Diri seperti di bawah,


Untuk membuat program tersebut, saya membuat class yang bernama datadiri, dimana pada BlueJ divisualisasikan seperti berikut, 


Didalam class datadiri tersebut, merupakan source code yang memberi output nama kelas dan sebagainya, berikut source code dari class datadiri tersebut,

 /**  
  * Bagian dari Hello World, untuk latihan 1  
  *  
  * @author (Mohammad Rizaldi Huzein Prastomo)  
  * @version (0.0.1/20180903)  
  */  
 public class datadiri  
 {  
   public datadiri()  
   {  
     System.out.print(" Tugas PBO-B 1\n");  
     System.out.print("===================\n\n");  
     System.out.print(" Nama\t\t: Mohammad Rizaldi Huzein Prastomo\n");  
     System.out.print(" Kelas\t\t: PBO B\n");  
     System.out.print(" Alamat Rumah\t: Jl. Teuku Umar 42, Jogotrunan, Lumajang\n");  
     System.out.print(" Email\t\t: rizaldihuzein@gmail.com\n");  
     System.out.print(" Blog\t\t: rizaldihuzein.blogspot.com\n");  
     System.out.print(" HP/WA\t\t: 085790348906\n");  
     System.out.print(" Twitter\t: @rizaldihuzein\n");  
   }  
 }  

Berikut merupakan membuat program data diri sederhana menggunakan Java dengan BlueJ,
Terimakasih